Creating Your First Sparky Traffic Bot Campaign: Everything You Need to Know
Learn how to create your first Sparky Traffic Bot campaign for free. Step-by-step setup guide to boost your website traffic and optimize your results today!

Ready to boost your site's visibility? Follow this quick step-by-step guide to create your first Sparky Traffic Bot campaign and start generating free, automated traffic today.
Step 1: Click on the “New Campaign” button as shown in the screenshot below.
 Locate the New Campaign option within the sidebar menu.
  Sparky Traffic Bot - New Campaign Page
Step 2: Configure Your Campaign
After selecting New Campaign, fill in the following details to set up your traffic flow:
1. Campaign Name: Enter a unique name to help you identify this campaign later.
Details Section

2. Enter URL: Add the target websites you want to drive traffic to. Each URL should include http:// or https://. You can add multiple URLs (one per line) and the system will visit them according to your URL order setting.

3. URL Order: Choose how multiple URLs are visited: 'One by One' visits URLs in the exact order listed, 'Random' visits URLs in a random sequence for more natural traffic patterns.

Note: To use the URL Order feature, you must enter multiple URLs into the Enter URL field.
4. Wait Time After Visiting Initial URL: Time to wait on each page after it loads. This simulates real user behavior and helps avoid being detected as automated traffic. Longer delays appear more natural but slower overall.

5. Referrer Extension: Enable this to simulate traffic originating from other websites. This makes your traffic appear organic by showing an external source. If disabled, visits will be recorded as "Direct," meaning they appear to have no referring source.

6. Referrer URLs: List of websites that will appear as traffic sources. Add one URL per line. These will be set as referrer headers, making it look like visitors came from these sites. Use popular, relevant websites for best results.
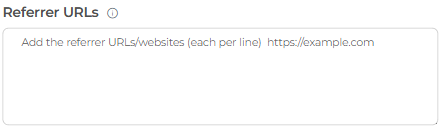
Note: To use Referrer URLs, you must first enable the Referrer Extension toggle.
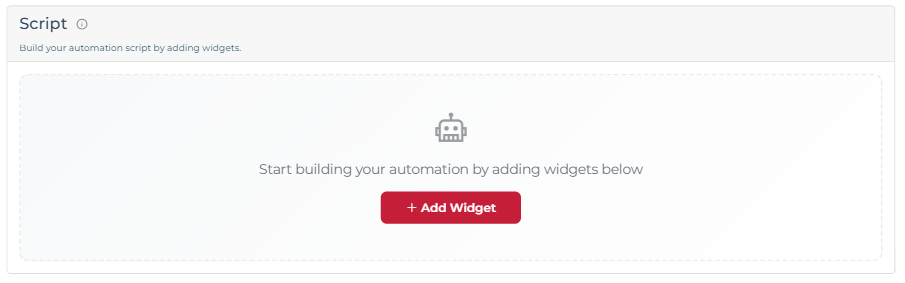
7. Script: Define a sequence of automated actions for the browser to perform on your target pages. You can add widgets such as URL Navigation, Wait, Scroll, and Click to simulate realistic user behavior. Please note that actions are executed in order from top to bottom.
8. Delay After Each Visit: Set the time to wait between the end of one session and the start of the next. These intervals create a natural traffic pattern and prevent server overload. Using a random delay range helps simulate unpredictable, real world user behavior.

9. Active Browsers: The number of simultaneous browser sessions running for this campaign. This determines how many "visitors" are active on your site at the same time.

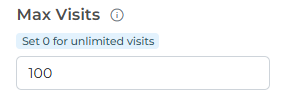
10. Max Visits: The maximum number of visits allowed per campaign. Set this to 0 for unlimited visits.
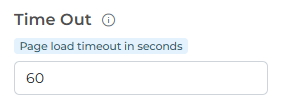
11. Timeout: The maximum duration (in seconds) allowed for a page to load. Increase this value for slow-loading websites, or decrease it to speed up the processing of faster pages.
Next, navigate to the Advanced section to configure additional options.
Advanced Section
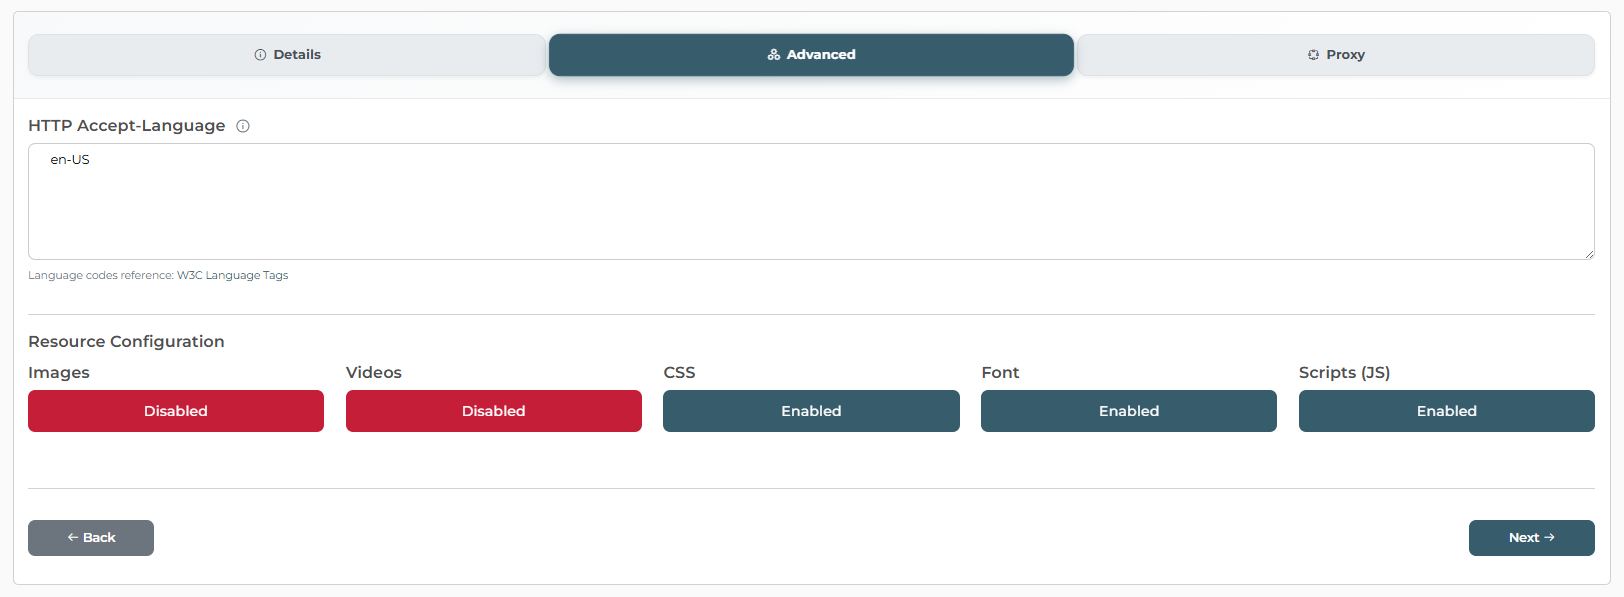
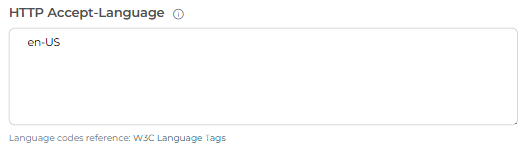
12. HTTP Accept-Language: Enter your preferred language codes (e.g., en-US, en, fr). You can provide a comma-separated list or enter one code per line. This setting configures the language header sent by the browser to match your target audience.
13. Resource Configuration: Enable or disable specific page elements such as Images, Videos, CSS, Fonts, and Scripts (JS). Disabling unnecessary resources can significantly reduce bandwidth usage and speed up page loading.

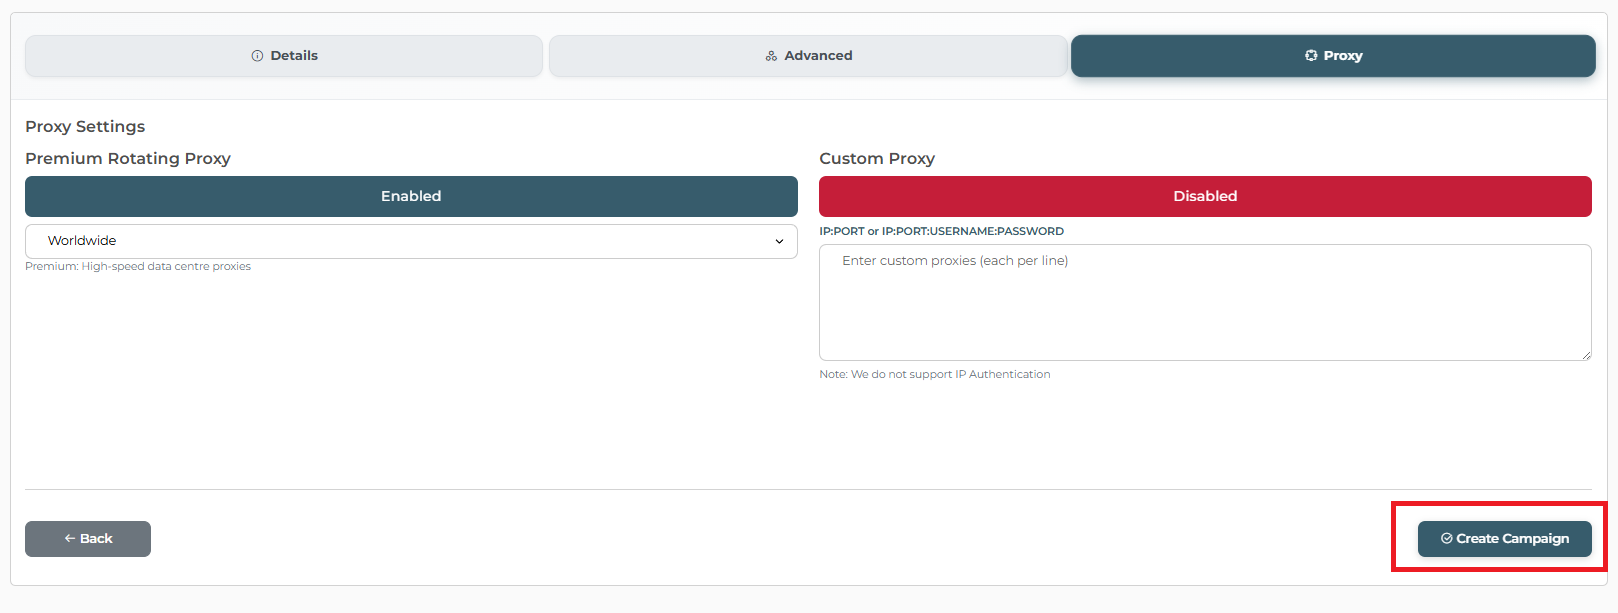
Next, navigate to the Proxy section to configure either Premium Proxy or Custom Proxy options.
Proxy Section
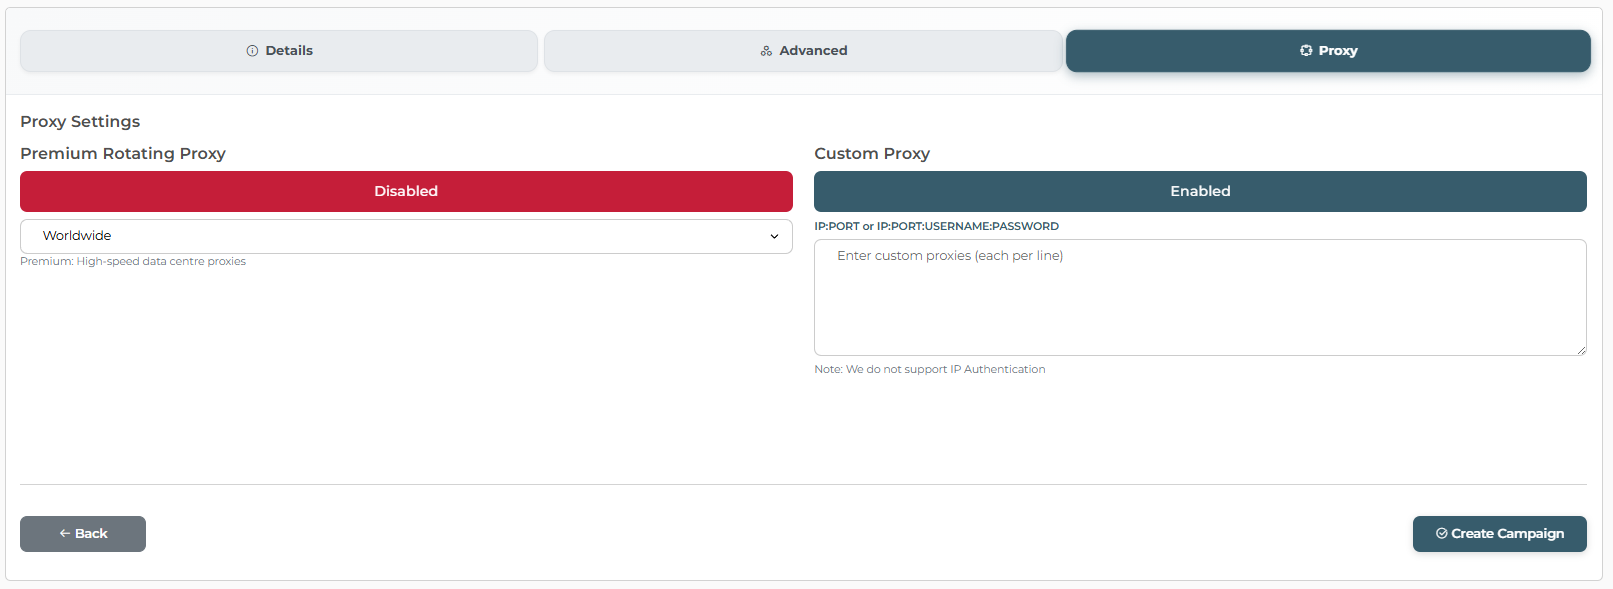
Proxy Settings: By default, Custom Proxy is enabled. To use the included subscription proxies, you must first Enable Premium Proxy:
- Premium Rotating Proxies: Access our built-in subscription pool featuring over 60,000 global datacenter proxies, including 20,000+ from the USA. We also offer Ad-Free Premium Proxies for cleaner browsing sessions. Simply select your preference from the dropdown menu
- Custom Proxies: To use your own providers, ensure the Custom Proxy toggle is active. You can add your proxy list using the following formats (one per line) IP:PORT or IP:PORT:USERNAME:PASSWORD
Now that your setup is complete, click Create Campaign to get started.